
If you have just installed Camtasia onto your computer you will most likely be presented with a tutorial project and automatically get launched into the Editor, which is the window where you edit your camtasia project together. However, if you have used Camtasia before on your computer, Camtasia will launch its default start window. This window will allow you to either start a new project, launch directly into a new recording, or browse your computer for a recent project that you’ve been working on.


A Note to Mac Users
If you open and close Camtasia from your application dock multiple times during a session, sometimes the default start window will not show up. If this happens, click on the Camtasia Icon in the application dock at the bottom of your screen and go up to the top left hand corner of your screen and click on File > New Project.

Editor Overview
Please use the numerically labeled guide below as reference to were the individual pieces of the Camtasia Editor are in relation to the Editor as a whole.

1. The Media Bin

The Media Bin is where you can find your project recordings or other pieces of media you wish to put into your timeline. To add media to your media bin that isn’t recorded with Camtasia (such as images, pre-made videos, or music) click on the plus icon at the bottom of the Media Bin (Camtasia 3) and upload files either from your computer or Google Drive. For all other versions, you can also right click anywhere in the bin and select “Import Media…” from the drop down menu.

2. The Canvas:
The Canvas is the large playback area in the middle of the editor that allows you to watch what is assembled on the timeline. The player controls for the Canvas work just like a regular media player with a few extra features to move across the timeline.

Features of the Player Controls for the Canvas
Working from left to right, let’s go over the different player controls at the bottom of the Canvas that allow you to interact with and view your project:
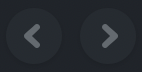
Previous Frame and Next Frame Buttons:
Allow you to move one frame forward or one frame backwards.
A Note On Frames:
Video editors are traditionally measured in frames which are different than traditional per second or minute playback which can be found on most media players such as Youtube. Frames are basically how many pictures your camera take in a second to create a video file and the most common frame rates are 24, 30, and 60 frames per second.
Play/Pause Button:

The combined play and pause button allows you to start and stop playback when reviewing your project.
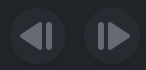
Previous Media and Next Media Buttons:
Allows you to move between the beginning and end of each piece of media on the timeline.
Scrubber Bar:

Allows you to drag the playhead freely across the duration of you video.
3. Timeline and Tracks:
The Timeline is where your video comes together. You can edit you video together by adding media from the Media Bin and dragging them onto the desired area of your timeline. The Tracks of the timeline are areas where you can place the media either one after the other in the first track, or stack different pieces of media on top of each other to create different effects such as voice overs for video or picture files being placed beside you on screen. The small line that moves across the timeline when you play or review different parts of your video is the Playhead. The Playhead is the visual marker to show you want part of the video you are viewing in the video timeline and will indicate where some edits will automatically take place.

4. The Tools Bin:
The Tools Bin is the area on the left hand side of the screen that allows you to access your media and different supporting tools that allow you to edit your video together.

5. Record Button:

Finally, the Record Button is where you can start your recording. Once the record button at the top left hand side of the screen is pressed, the Editor Window will drop away and reveal the Recording Window.