
OneDrive for Business is a cloud-based storage and collaboration tool from Microsoft that lets users store and share their files, including downloaded Zoom recordings. More information about OneDrive can be found on the CSUCI Information Technology Services (ITS) website.
To archive your Zoom cloud recordings in OneDrive, there are two main steps: downloading the recording from Zoom, and uploading the recording to OneDrive. Each recording needs to be downloaded individually.
Downloading a Zoom Cloud Recording
First, you’ll need to download your Zoom cloud recording(s) to your computer.
- Log in to myCI and click on the Zoom button.
- On the left sidebar, click Recordings.
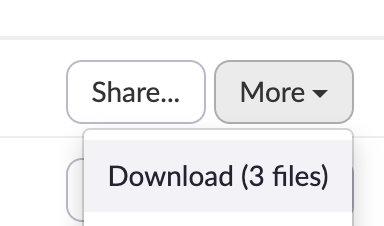
- To the right of each recording that you want to download, click the dropdown menu titled More and then select the Download option. If an audio file (m4a) and a captioning file (vtt) is available for your recording, they will be downloaded as separate files.
- Once you’ve downloaded your recording, you can delete it from your list of recordings.
- Optionally, but recommended, once you’ve downloaded a recording, you can rename it on your computer so that it’s easier to find and recognize later. The video of the recording will be the .mp4 file.
Uploading a Recording to OneDrive
Once you’ve downloaded your cloud recordings from Zoom, you can upload them to your CSUCI OneDrive account. The steps below will walk you through uploading a recording to OneDrive using the web interface. For more information about using OneDrive natively on your PC or Mac, refer to the ITS website.
- Login to myCI and click the OneDrive button

- Click the + New button at the top of the screen and select the Folder option. This step is optional but it’s highly recommended so that you’re able to keep your storage organized. If you choose to not use folders, you can skip to step 5.
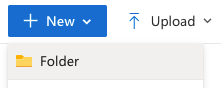
- Give your folder a name, such as ‘Zoom Cloud Recordings,’ and then click the Create button. You can create additional folders within this folder if you wish by clicking the folder to open it, and then repeating steps 2 and 3.
- Click the newly created folder to open it
- Click the Upload button at the top of the screen and select the Files option
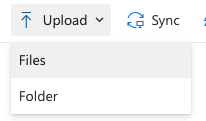
- Select the recording or recordings that you downloaded previously and would like to upload to OneDrive. The video recordings will be the files that end with .mp4.
- While the recording or recordings are uploading, you’ll see an ‘uploading,’ status in the upper right corner. Once the file has been uploaded, you’ll see a success notification appear.

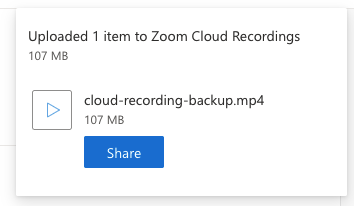
- That’s it! Once you’ve uploaded a recording to OneDrive, you can easily share it with colleagues either directly from within OneDrive or via email using the Attach > Browse cloud locations option within Outlook.
For more information about sharing files and using OneDrive, please visit ITS’s OneDrive website.
