
Zoom is now integrated into CI Learn (Canvas) courses and can be accessed by both faculty and students from the course menu. Students can also access meetings for their classes from the course calendar. Meetings that are scheduled using the Zoom integration in CI Learn can also be launched from your Zoom profile or from the Meetings section of the Zoom application.
- From within your course, click ‘Zoom’ from the course menu
- Next, click ‘Authorize’ to grant the Zoom app access to your course calendars. You should only have to do this step once.
- You will then be taken into the Zoom screen within your course
Scheduling a Meeting in CI Learn/Canvas
- Click the ‘Schedule a New Meeting,’ button in the upper right corner

- Enter a topic for your meeting. By default, this field will populate with the name of your course.
- Set the date, time, and duration of your meeting. If this is a recurring meeting, check the ‘Recurring meeting,’ box below the time zone field
- When setting up a recurring meeting, you can set how often the recurrence should be (daily, weekly, monthly, or no fixed time). When using the weekly option, you can have the meeting recur on multiple days in a week, so long as the time and duration are the same for each occurrence.
- Set the rest of the settings to suit your needs. We do recommend enabling a few settings when setting up meetings for your class:
- Security – we recommend using at least one of the security options for your meeting. These settings aid in preventing unwanted visitors from popping into your meetings. Below is a brief description of each of the three options:
- Passcode – a numeric passcode will be required for your students to access the meeting. They’ll be able to view the passcode information by clicking the Zoom link in the course and then clicking the ‘Invitation,’ button. The passcode can also be posted as an announcement or sent as a message to your students using the Canvas inbox.
- Waiting Room – this option places students in a virtual waiting room where they’ll remain until they’re admitted into the meeting by you, the host. This allows you to see the name of participants before allowing them into the meeting, which lets you ensure that the names in the waiting room match those of the students that you’re expecting to join.
- Only Authenticated Users Can Join Meetings – this is the most restrictive and secure option, and requires participants to sign into Zoom using their CSUCI Zoom accounts.
- Video – we recommend leaving the ‘Participant,’ option to Off so that students are able to turn their cameras on when they are ready and willing.
- Meeting Options – there are two options here that we strongly recommend leaving disabled: ‘Enable join before host,’ and ‘Record the meeting automatically.’
By disabling the join before host option (default) students will not be able to join the meeting prior to you being present. Instead, they will see a message that they are waiting for the host to start the meeting, or the waiting room if you’ve enabled that option.
While it may seem useful to turn on the automatic recording option, we recommend refraining from this for a few reasons. One is that it allows you to prompt your class that you will be recording the session so that they can turn off their cameras if they prefer. This is their right as a student and should be presented. It also prevents extraneous recordings from being saved to your Zoom cloud storage.
- Security – we recommend using at least one of the security options for your meeting. These settings aid in preventing unwanted visitors from popping into your meetings. Below is a brief description of each of the three options:
- Click the ‘Save,’ button
- Your meeting (or meetings if you created a recurring meeting) will now appear in the Zoom screen for your course as well as appear in your course calendar. An important thing to note is that only the meetings that are scheduled for the current course will appear in the Zoom screen. If you want to see all of your Zoom meetings, you can click the ‘All My Zoom Meetings/Recordings,’ link in the upper right corner
Once your meeting is scheduled, you can also access it outside of Canvas. Since the Zoom integration within Canvas is paired with your Zoom account, you can also launch the meetings from your Zoom profile or from the Meetings section of the Zoom application.
Editing an Existing Meeting
- Click the name of a meeting in the ‘Topic,’ column. If you’ve set up a recurring meeting, you only need to edit one instance of the meeting and changes will be reflected in all instances)

- If you need to delete an individual meeting from a set of recurring meetings, click the ‘View all occurrences,’ link and then click the ‘Delete,’ button to the right of the meeting that you’d like to remove.

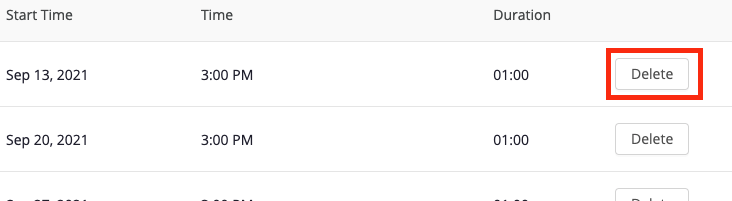
- If you need to delete an individual meeting from a set of recurring meetings, click the ‘View all occurrences,’ link and then click the ‘Delete,’ button to the right of the meeting that you’d like to remove.
- Scroll down to the bottom of the page and click the ‘Edit this meeting,’ button
- Make your changes
- Click the ‘Save,’ button
How Students Join a Meeting
Students can join Zoom meetings for their classes in a couple of different ways:
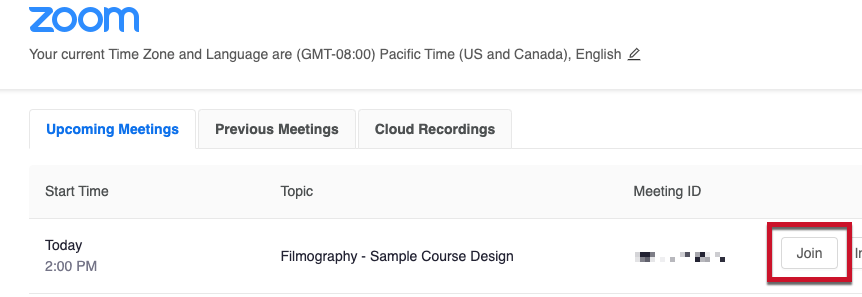
- By clicking the Zoom link in the course menu and then clicking the ‘Join,’ button to the right of the meeting.
- By navigating to the course calendar in Canvas and then clicking the meeting on a given day. This will show the event along with a clickable link that will take the student into the meeting.
