
You or the participants in your meeting can easily share your screen with those in the meeting. Participants can share their screen as well. This tool is useful for reviewing work with students or providing content during synchronous class meetings. In conjunction with Screen Sharing, the Annotation tools allow both Host and Participants to type, highlight, and raw on the with the screen when discussing documents, presentations, or web based resources. Annotations can be saved and shared for reference after the live session.
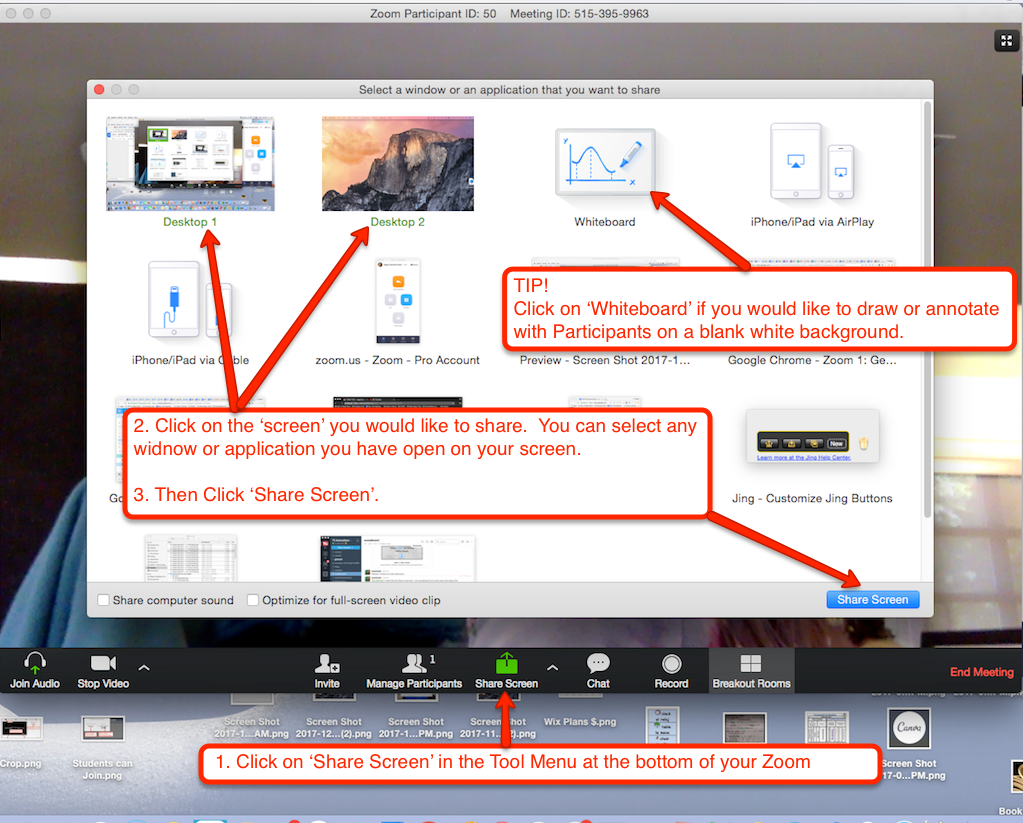
To begin sharing your screen:
- Mouse over the bottom of your Zoom Window and the Tool Menu will appear
- Click on the button that says ‘Share Screen’
- From the Window that appears, select the ‘view’ you want to share with other meeting participants. Then click ‘Share Screen’
Useful Resources:
- How Do I Start A Screen Share Meeting?
- Screen Sharing with Powerpoint
- Screen Share iPhone/iPad Apps
- Screen Sharing (21 Possibilities)
Annotation
To locate the Annotation Tool as the Host, once you have shared your screen, click on the green meeting ID Bar, and a Menu will appear at the top of the screen.
- Click on ‘Annotate’ and more tools will appear.
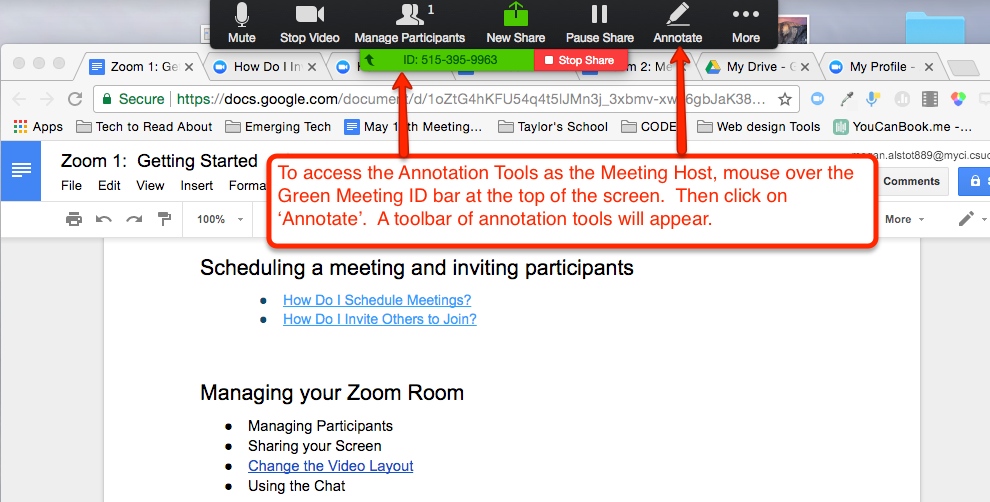
- Next, click on the tool that you’d like to annotate with
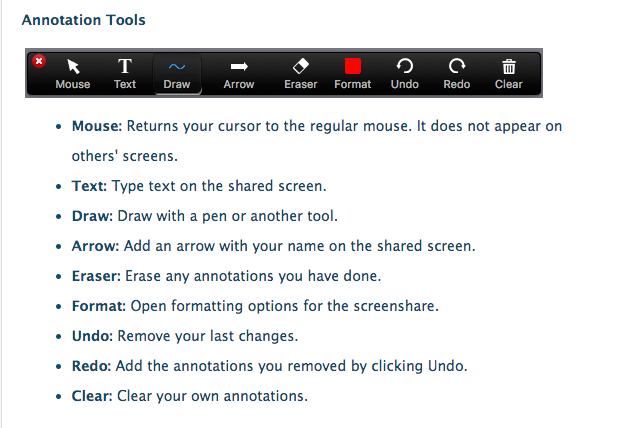
Annotation tools include:
- Mouse: Returns your cursor to the regular mouse. It does not appear on others’ screens.
- Text: Type text on the shared screen
- Draw: Draw with a pen or another tool
- Arrow: Add an arrow with your name on the shared screen
- Eraser: Erase any annotations you have done
- Format: Open formatting options for the screenshare
- Undo: Remove your last changes
- Redo: Add the annotations you removed by clicking Undo
- Clear: Clear your own annotations. You can clear all annotations if you’re the host.
