
Review the AI-Assisted PDF Remediation for Accessibility guide, which outlines important limitations, best practices, file requirements, and key considerations for using the app effectively. The remediation tool can automatically resolve many structural issues, but it does not replace required manual checks or final verification. Reviewing the guide first will help ensure you use the app appropriately.
Accessing the App
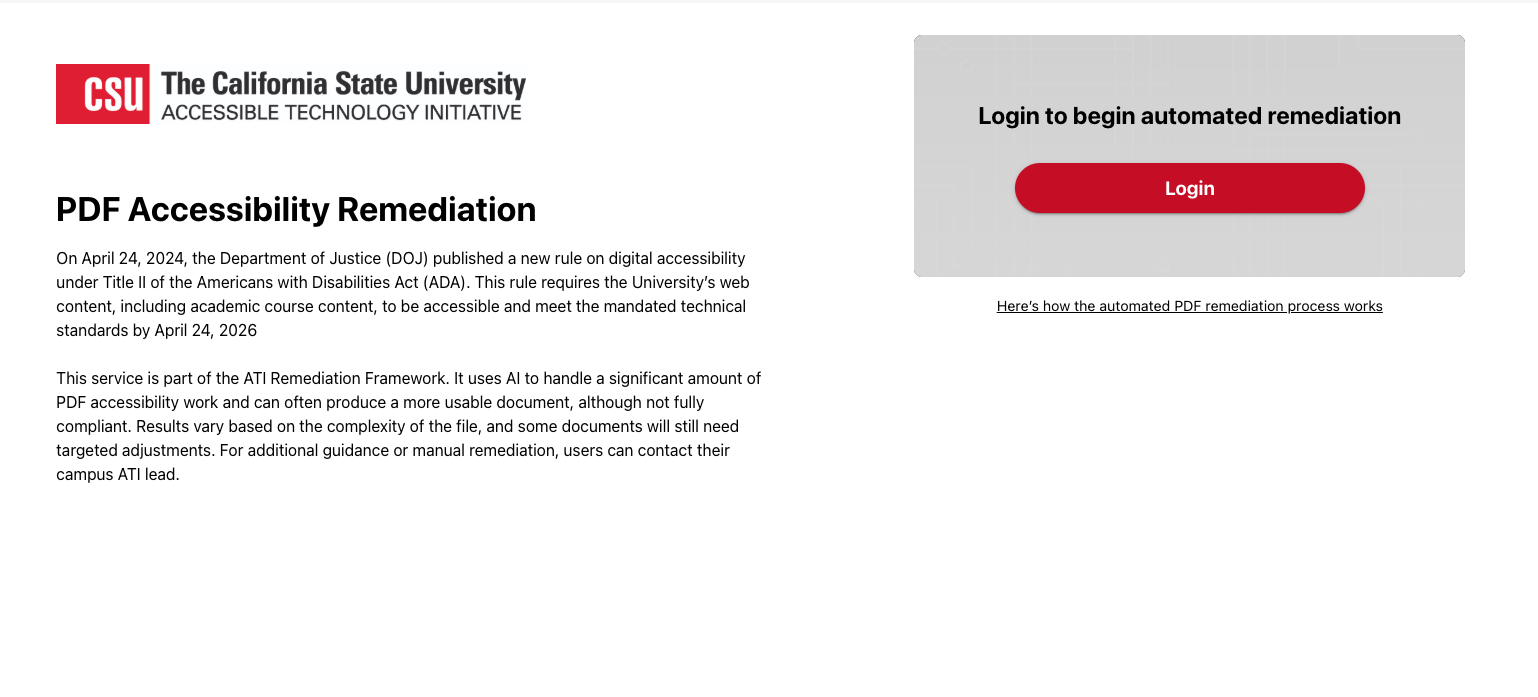
- To begin, click Login on the Cal State PDF Accessibility Remediation Page.
- Select Channel Islands from the campus list to be taken to myCI to log in.
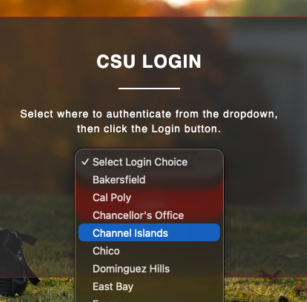
- Log in to myCI as you normally would, and you’ll be taken to the app.
Getting Started
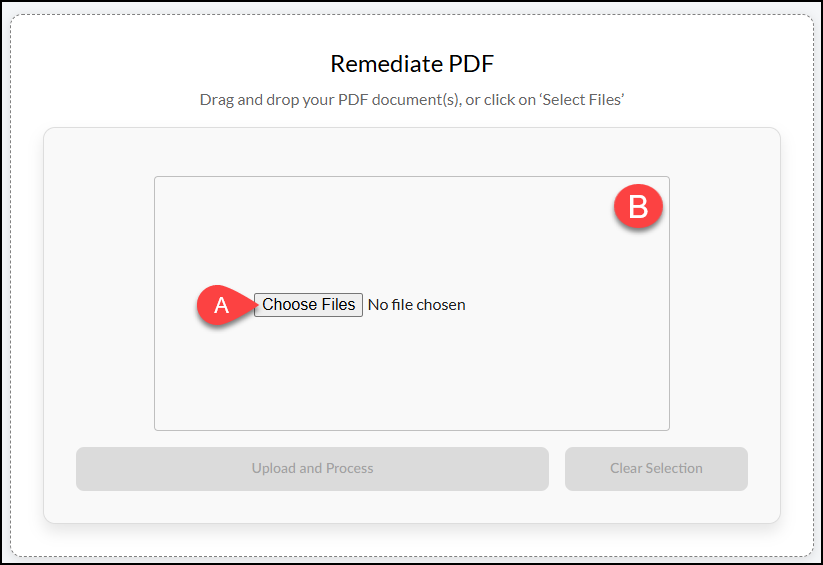
- Once the app has loaded, you can either click on Choose Files (Label A in image below) to upload files or drag and drop (Label B in image below) files from your computer into the upload box.
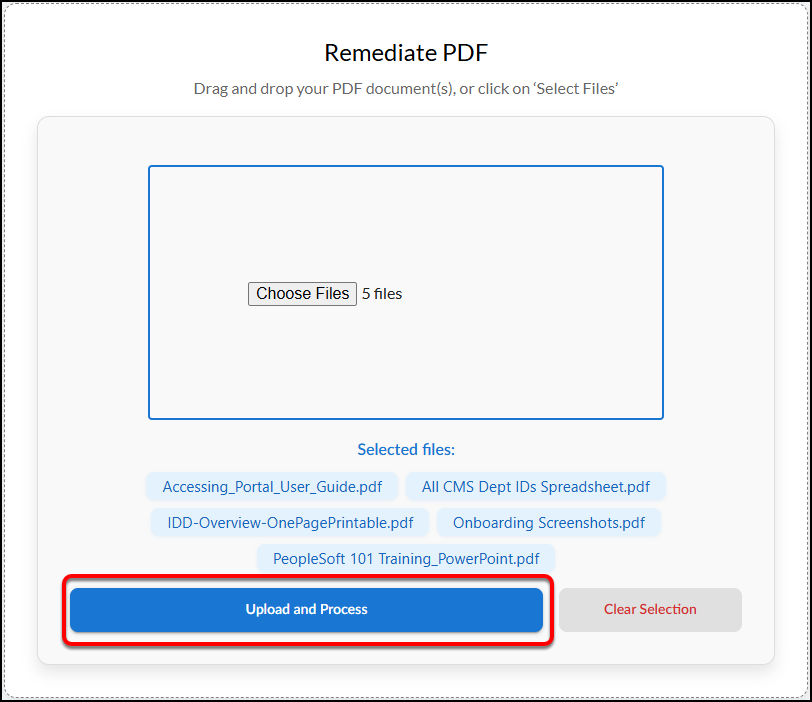
- Click Upload and Process once you have added the file(s).
Once the file(s) have been processed, a Remediation Results area will appear. You may notice a spinning circle within the Processed File column until the file is processed.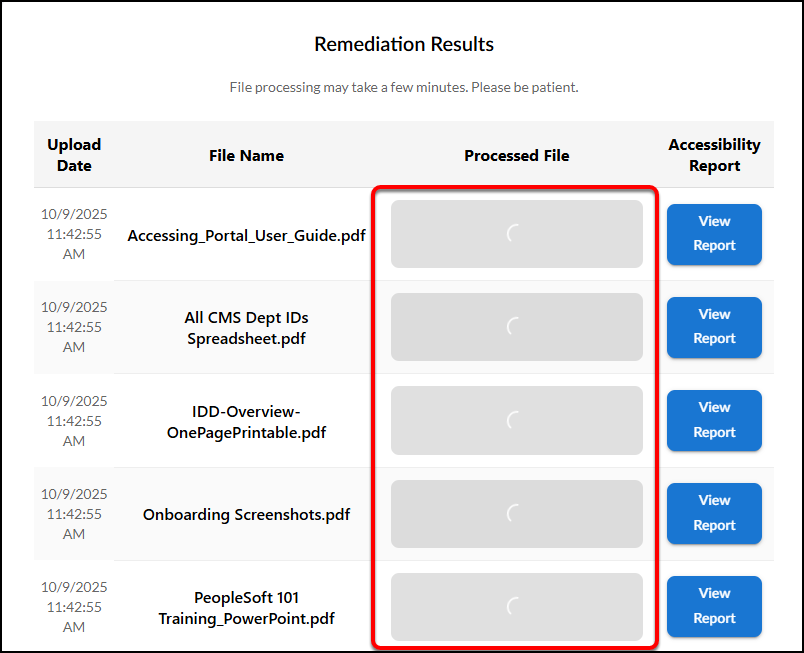
- After processing, the spinning indicator becomes a Download Button. Click the View Report button in the Accessibility Report column to open it and view the results.
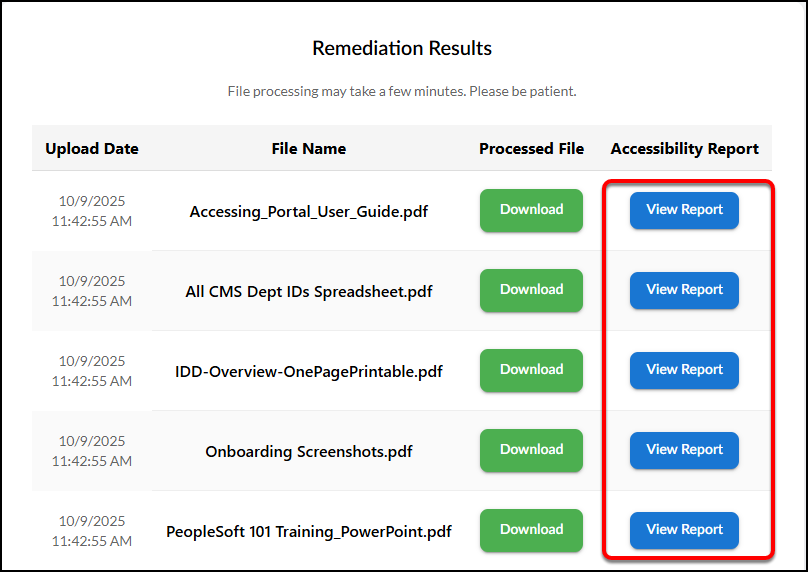
The Accessibility Report window includes a Before Summary and an After Summary above a Detailed Report.
- Within the After summary, check for any numbers in the Needs Manual Check column (Label A in the image below) and the Failed column (Label B in the image below). These numbers specify how many issues you will need to manually review/resolve.
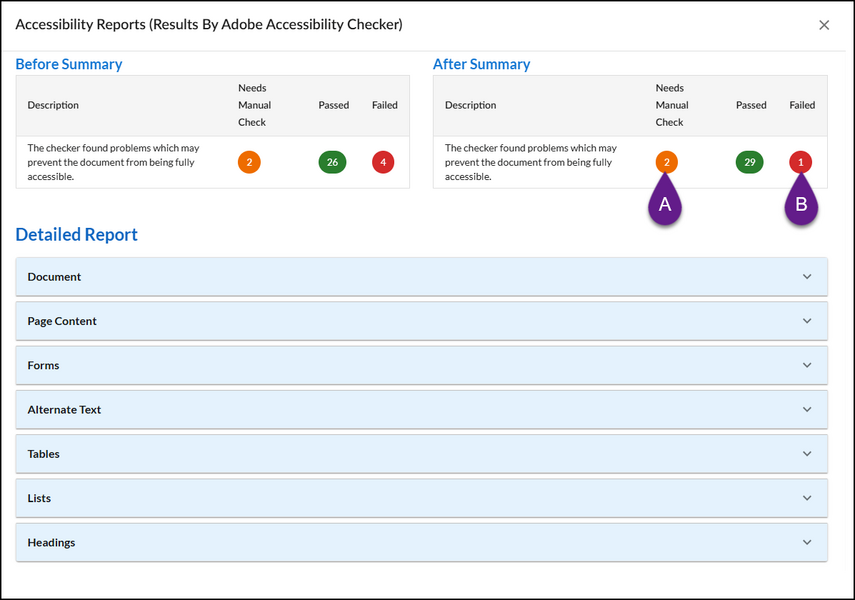
Needs Manual Check items are generally things that cannot be checked or resolved by accessibility checkers, such as color contrast or logical reading order.
Failed items are generally things that the PDF Remediation app is unable to fix automatically, such as a table summary or alt text for a figure.
- Click on each section in the Detailed Report to find the specific issues that need to be manually reviewed/resolved.
In the example below, there are two Needs Manual Check issues found in the Document section.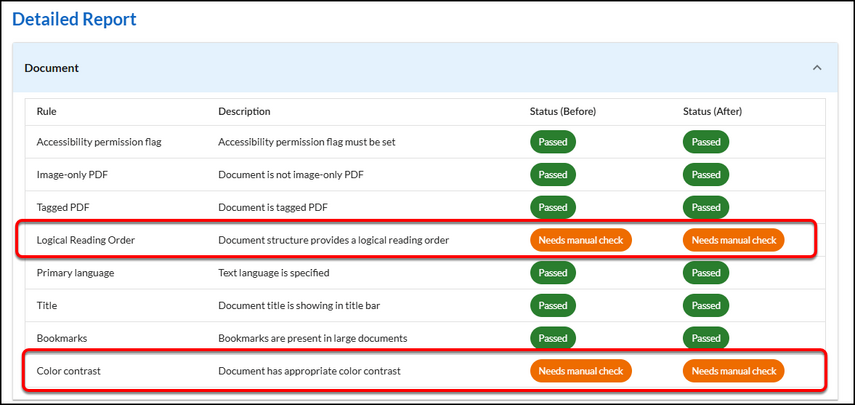
- To print or save the report for a file, click the Print Report button below the Detailed Report area.
Be sure to expand any sections you want included before clicking Print or Save as PDF. Otherwise, only the section headings will appear in the printed or saved report.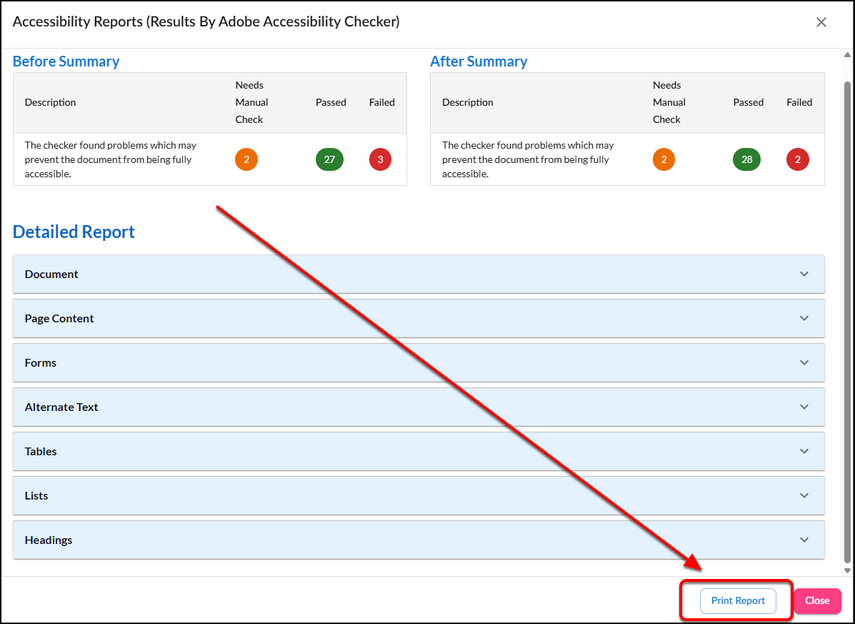
When finished, click the Close button next to Print Report or click the X in the upper right corner to return to the Remediation Results area.
- Click the Download button in the Processed File column to save a copy of the processed PDF file.
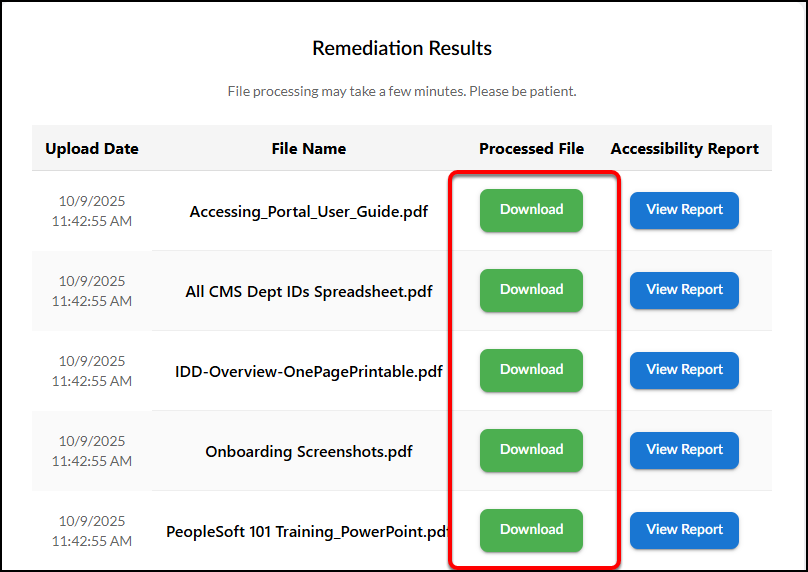
Important: Remediated files remain available for 3 days. After 3 days, they are automatically deleted and cannot be recovered.
- Refer to the printed/saved Accessibility Report while performing the required manual checks to resolve the remaining issues in Adobe or another PDF editor software.
A PDF file is not considered “remediated” until all manual checks have been performed and all accessibility issues are resolved.
This guide has been modified from the version created by CSUF.
