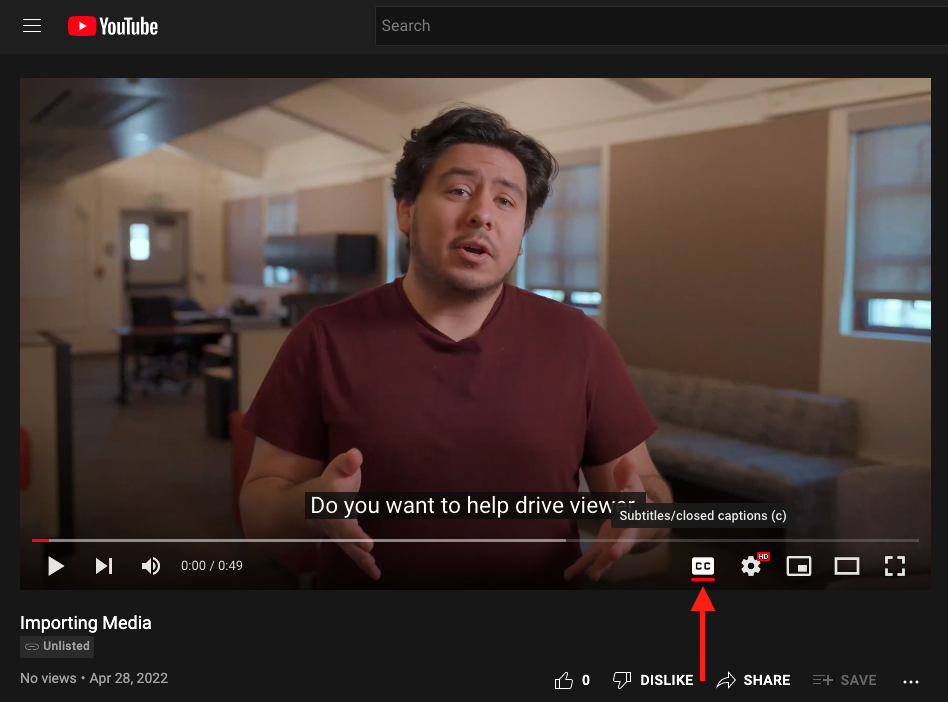
The July 2021 release of Premiere Pro (v. 15.4) introduced Speech to Text, which adds automatic video transcription for the Captions workflow. Before you begin, ensure you have the correct version of Premiere Pro installed.
Before you begin captioning…
Ensure that the video you are working on is finalized. Meaning that the video no longer needs to be edited, cut down, or changed. A typical workflow for captioning videos happens towards the end, it is the last task before exporting the video.
If you have any questions or need assistance with editing a video, reach out to us through email at tlinnovations@csuci.edu or fill out and submit the Internal Media Request Form.
Importing Media
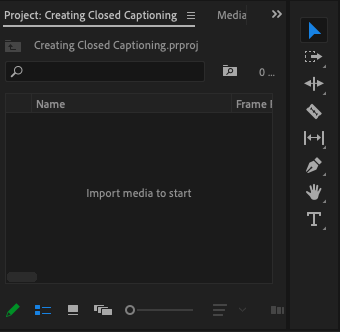
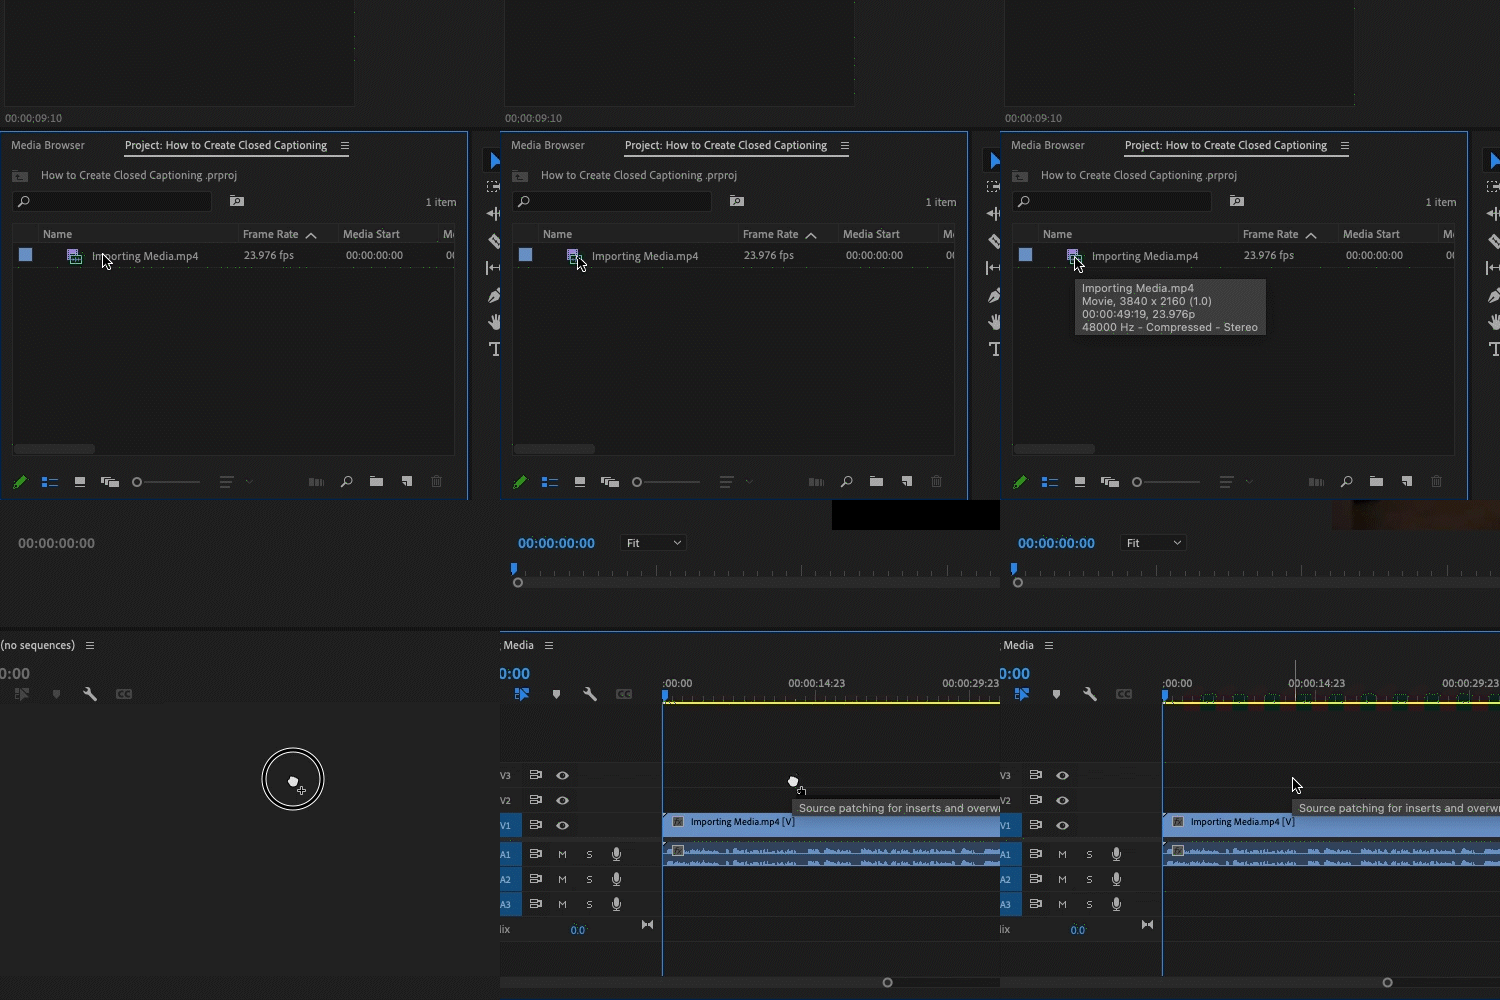
Navigate over to the project bin at the bottom left, and double click the empty space to bring up your computer’s browser and select your video(s), or drag and drop video(s) from your computer into the project bin. Once you have uploaded your video(s) into the project bin, click and drag the media from the project bin onto the timeline track.
Enable the Text Panel to Begin Captioning


For first time Premiere Pro users, enable the “Text” panel by clicking on “Window” in the menu bar, then scroll down and select “Text” to enable captioning. The text panel should automatically come up once it has been selected.
Auto-Transcribe the Video
The Auto-Transcribe feature in Premiere Pro is not, by any means, 100% accurate with its spelling, punctuation, syntax, and grammar; instead, the tool is best utilized to create a foundation before you begin editing the captions. With that being said, please take the time to fix any grammar, spelling, and/or punctuation mistakes before exporting the video.


Within the text panel, click on Transcribe sequence and a pop-up menu will appear. Select Audio on track, select mix in the dropdown menu, set language to English, then click on Transcribe to begin the process.
Depending on your computer’s hardware and the length of the video, this process usually takes a couple of minutes.
Edit the Transcript

Once the process has been completed, go through the transcript and make the necessary edits to ensure that spelling, grammar, and punctuation is correct; as well as, making sure the text sounds identical to the video.

You can also play back the video and have the text follow along through the transcript.
PRO TIP
- Type in the search term in the Search text field. Premiere Pro highlights all instances of the search term in the transcription.
- Use the up and down arrows to navigate through all instances of the search term.
- Click the Replace icon and type in a replacement text.
- To replace only a selected instance of the search term, click Replace. To replace all instances of the search term, click Replace All.
Create & Finalize the Captions
Once you have gone through your transcript and made the necessary edits to it, it’s time to create the captions. Thankfully, this process will be easy and, at minimum, two clicks away.
To create the captions:
- In the same text panel that you have been editing the transcript, click on Create Captions and small menu will come up.
- Within the menu, leave the caption settings in the default state and click on Create at the bottom.
- This will generate the captions and your text panel should look different and timestamps to the left of it.
- On the timeline, you should see yellow/orange tracks above your video and audio track.
- You will also see the captions when you playback your video.


You can make last minute corrections to your captions in this phase before you begin to export your video.
Export the Video & the SRT File
Before you export the video, export the .SRT file. The .SRT file is the file that contains the text of what’s being said in a video, along with the timing for those words and the order in which they appear. You will be using this file when you upload your video onto Youtube or Canvas.
Exporting the SRT File

In the same text panel that you have been working on, click on the 3 dots in top-right corner of the panel. A few options for exporting will appear. Select Export to SRT file…
You computer’s browser will come up. Name the file and save it too where you can easily locate it; preferably, wherever you plan on saving the video.
Exporting the Video
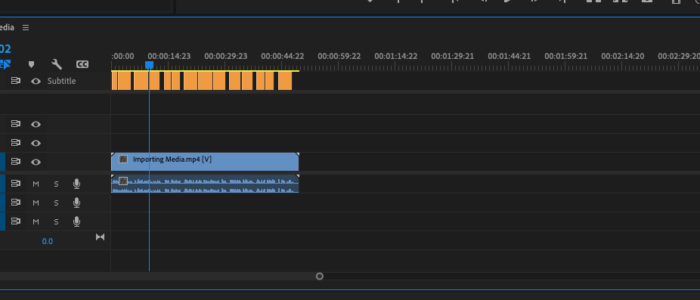
- Click and select the timeline panel, where the video, audio, and subtitle tracks are on.
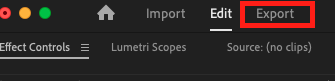
- Above the text panel, next to Edit, select Export
- Under Export Settings
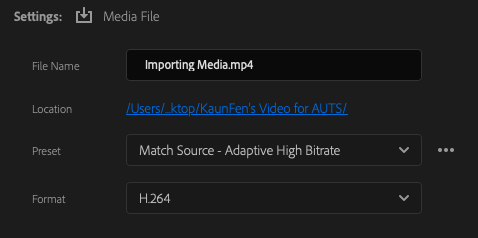
- Format > H.264
- Preset > Match Source – High Bitrate
- If it changes to Custom, then that’s okay.
- In Location: click on the blue text, rename your video, and select a place to save the video too.
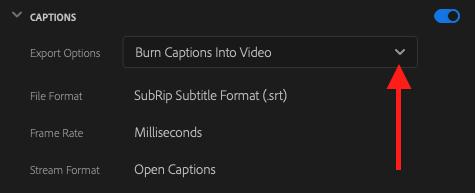
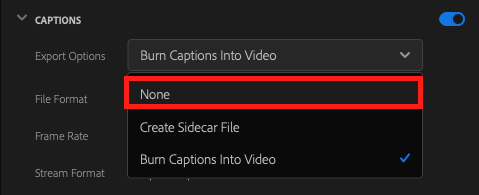
- In the Captions tab, under Export Options: Select None.
- You aren’t burning captions into the video; instead, you will use the .SRT file to embed the captions in a later step.
- Finally, select click on Export at the bottom right.
Uploading to Canvas or YouTube?
Now that you have exported the .SRT file and the final product video, follow the guide below on how to incorporate closed captioning to your video when uploading to Canvas or Youtube.
Uploading to Canvas
Whether you’re creating an assignment, page, or quiz, the process of uploading your video and embedding closed captions is the same.
Go ahead and create your assignment, page, or quiz within Canvas and then click on Edit.
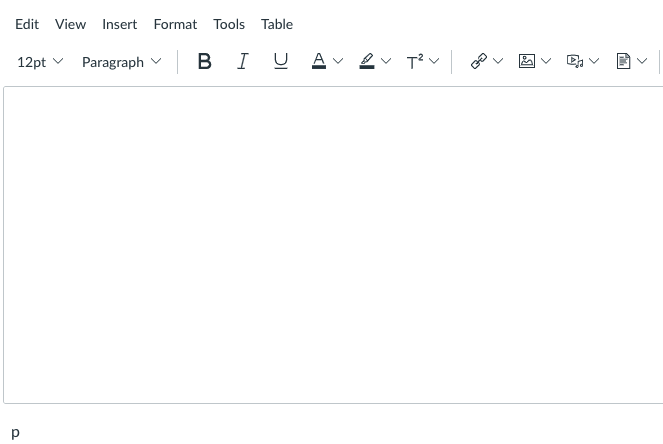
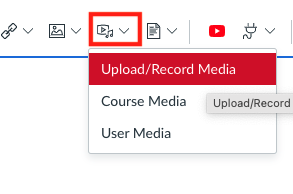
Within the rich content editor, click on the Record/Upload Media tool and select Upload/Record Media.
Drag and drop the video file onto the rocket ship or click on the rocket ship to browse your computer for the video file.


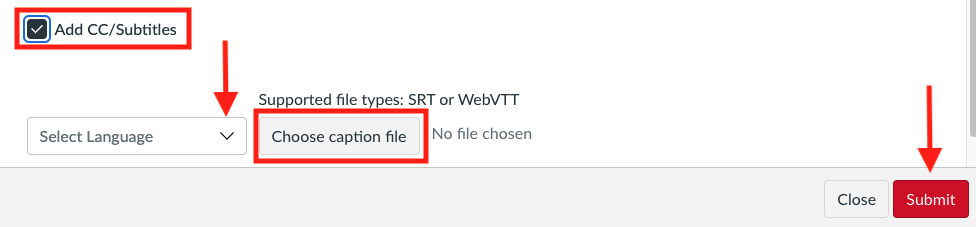
Turn on Add CC/Subtitles, select the language, click on Choose caption file, locate the .SRT file you exported in Adobe Premiere Pro, and then click Submit.
Once the video has been submitted, Canvas will upload your video into the rich content editor text box. Save or Save & Publish your content and you will be able to preview the video with the option to turn closed captioning on/off.

Uploading to YouTube
Go to Youtube.com and login to your account. On the top right corner, click on the camera icon and select Upload video. Same process as before, drag and drop your video file or click on Select Files to search for the video file on your computer.


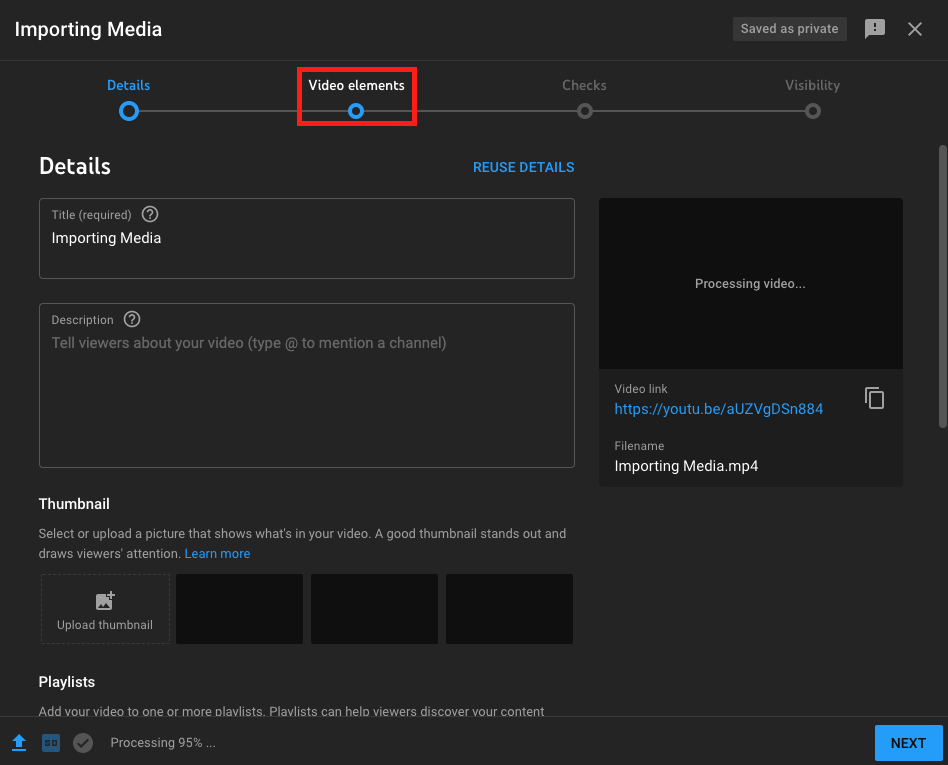
An editing menu will come up where you can make changes to the settings of your video. Once you are finished with that, click on Video Elements.
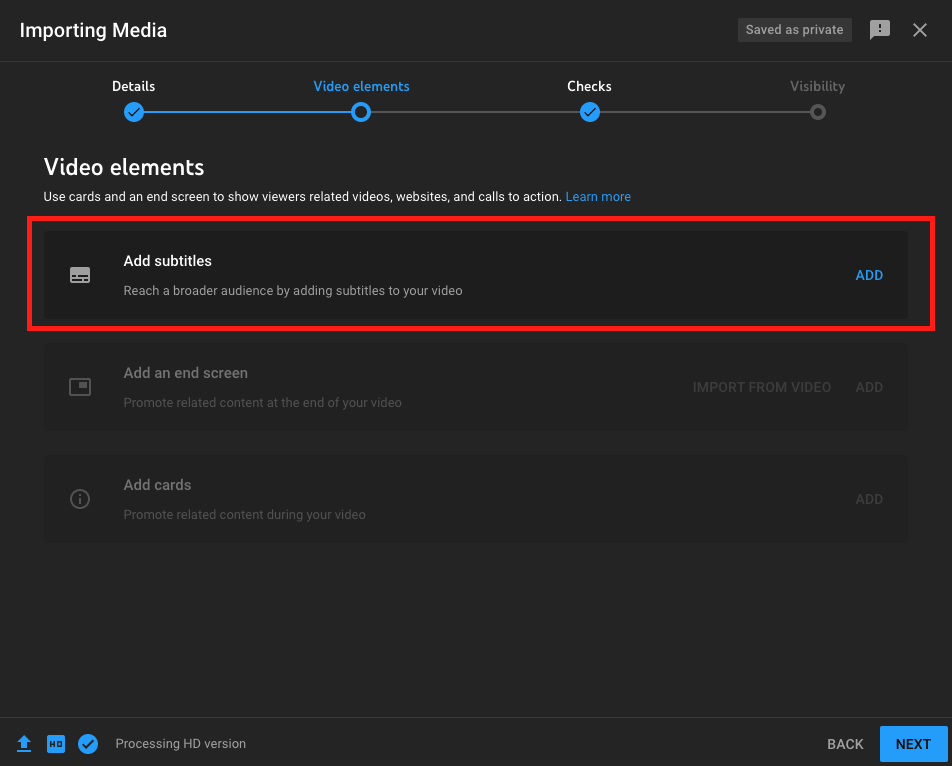
Within Video Elements, click on Add and a new editing menu will pop up.
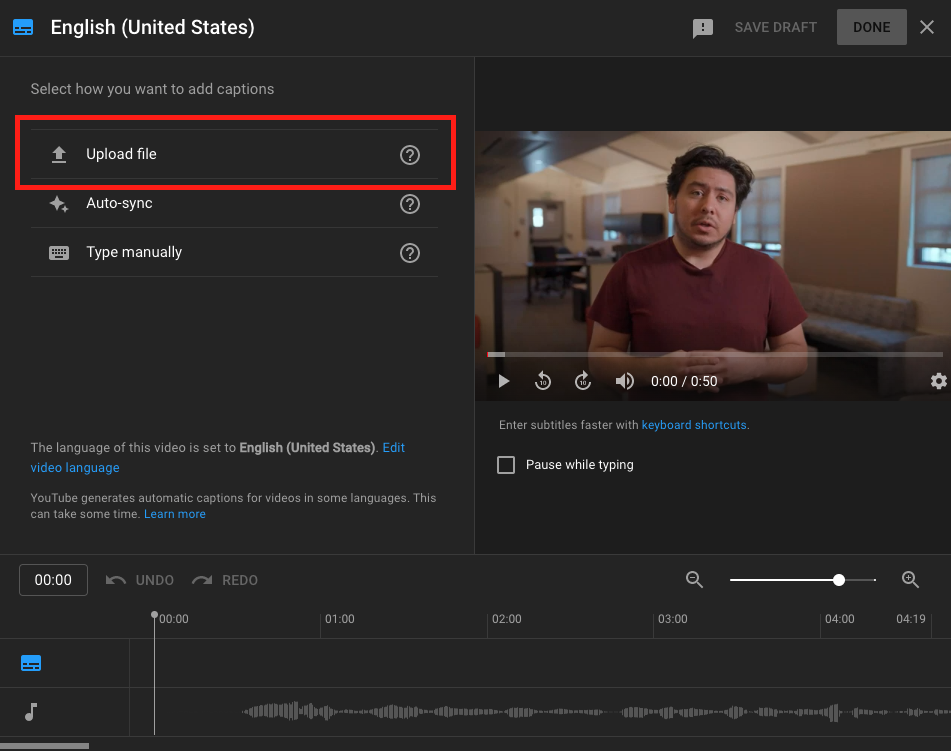
In the new editing menu, click on Upload file and locate the .SRT file that you exported from Adobe Premiere Pro.
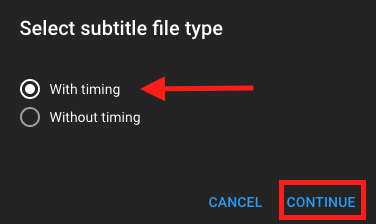
In the Select subtitle file type menu, have With timing selected, then hit Continue.
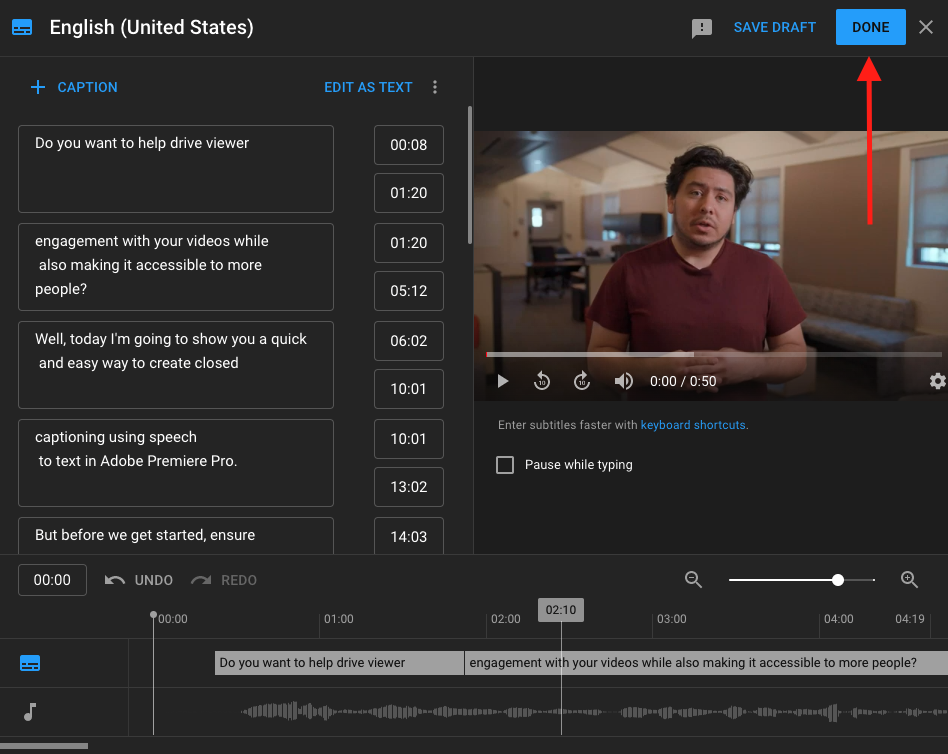
Lastly, click on Done and go through the Checks and Visibility settings before publishing your video.
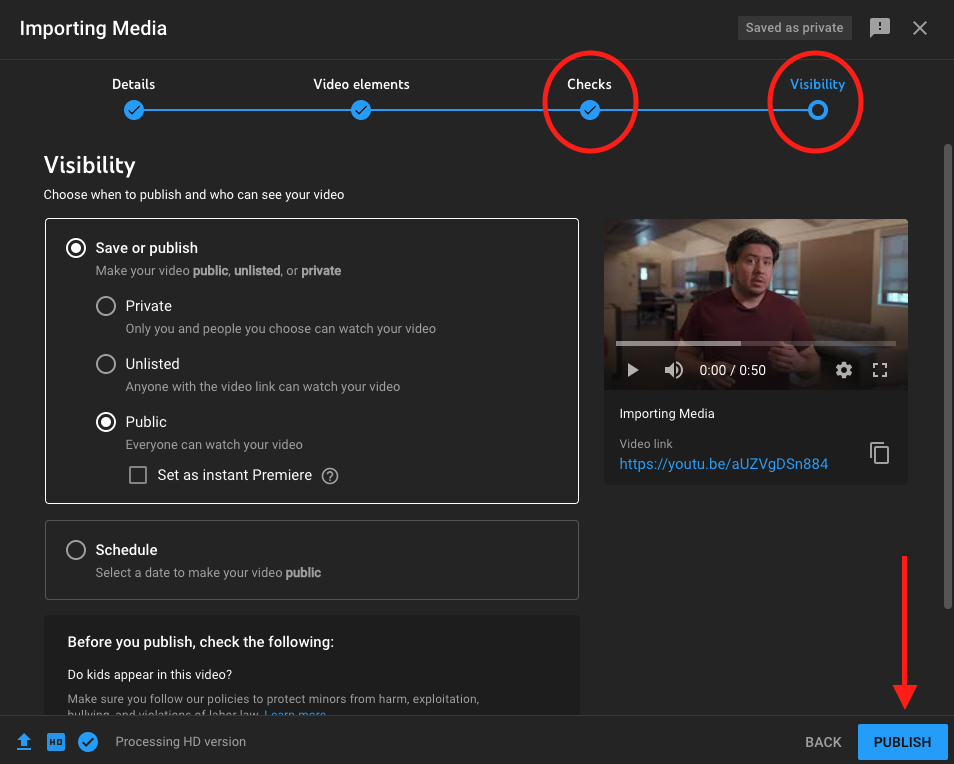
That should be it! Once the video has been done processing, you can check your video and toggle Closed Captioning on/off.