

You have been invited by a colleague or professor to add content to a Pressbook as an author. This article will show you how to:
- Login to Pressbook
- Setup your Password
- Add a Chapter
- Add and edit content
- Add Accessible Images
Logging into Pressbook
You will receive an email invitation to join the pressbook as an Author. Click on the link in the email to learn your username and password. You can change your password after you’ve logged in.
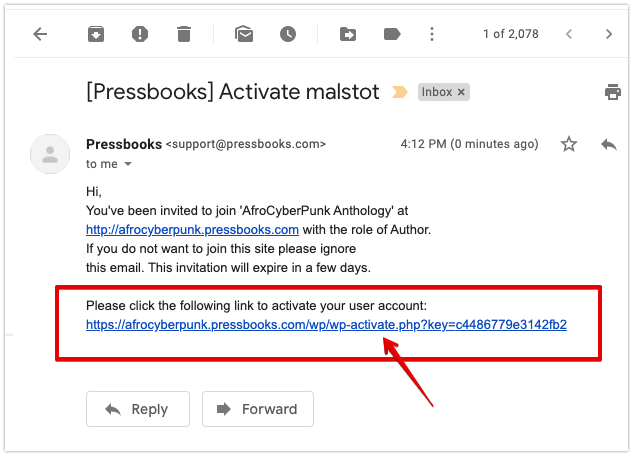
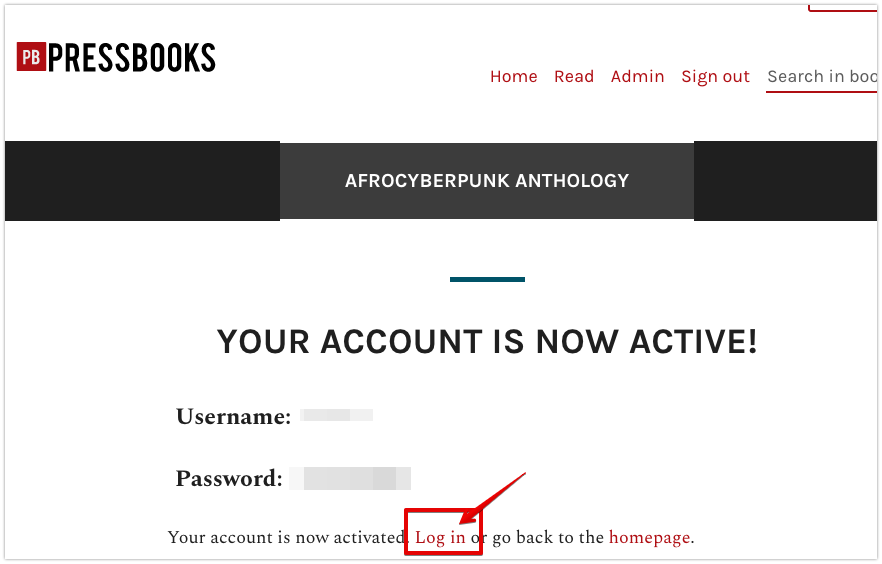
Clicking on the link will take you to your activation page. Click on the link to Log in with your assigned Username and Password.
Customize your password
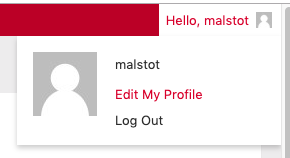
Locate your account profile. If you are working from a computer, this is located in the upper left corner of the screen. Click on your profile and select, Edit Profile.
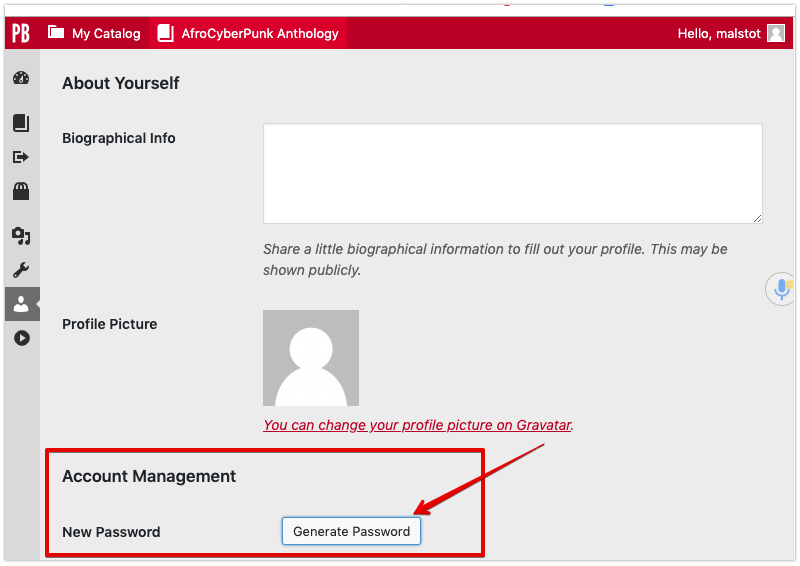
Once you have opened your profile, scroll down until you find Account Management. Select Generate Password to customize your password. Click Update Settings before you exit your profile.
Creating a Chapter
From the navigation menu on the left click Organize. Locate the block titled Main Body. Click on the option to Add Chapter.
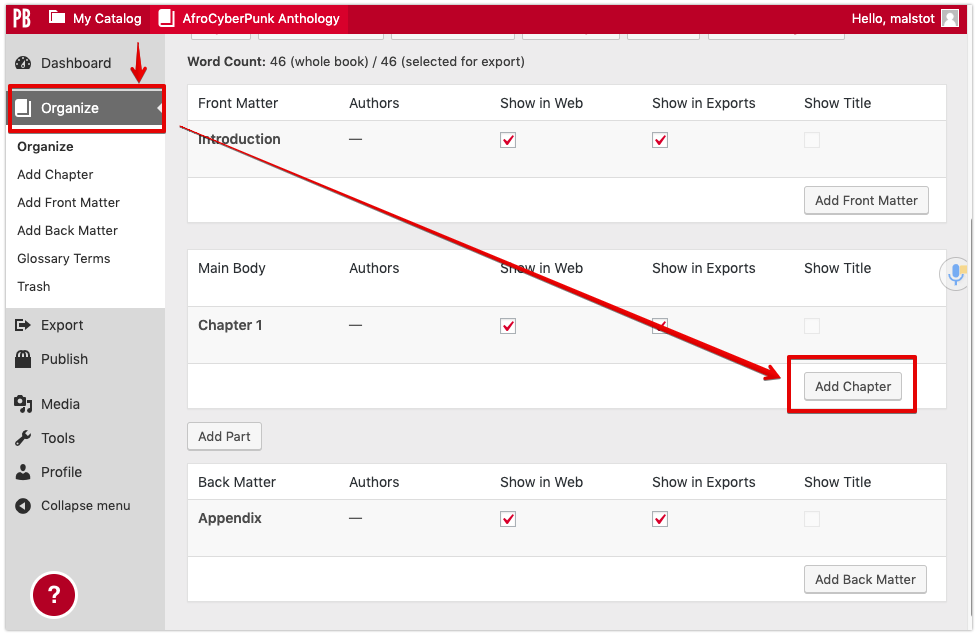
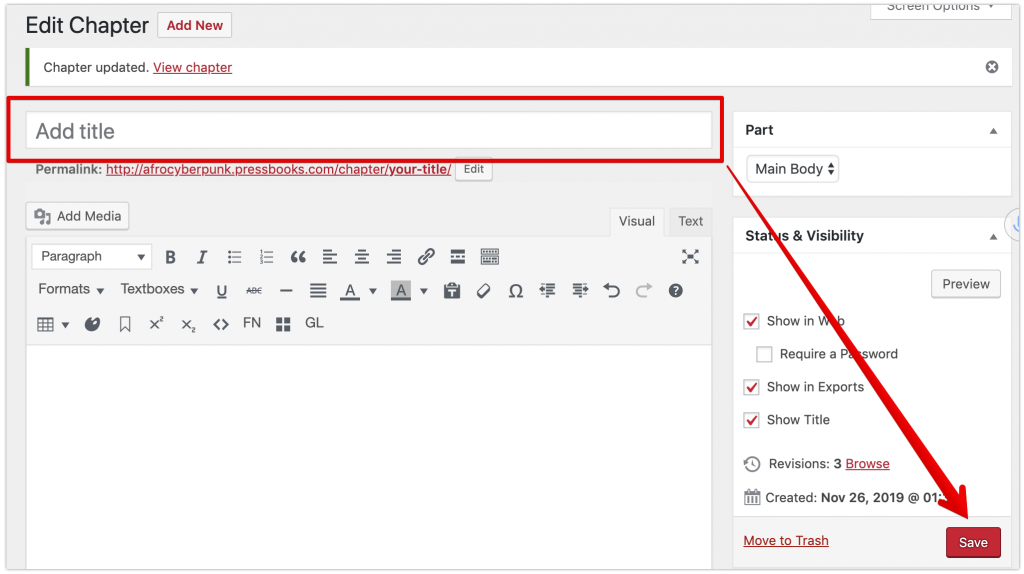
This will take you to your chapter and the Rich Content Editor (RCE) where you can compose and format your chapter content. Before you add content:
- Title your chapter (you can change this later)
- Select Save
Adding and Editing Content
The Rich Content Editor (RCE)
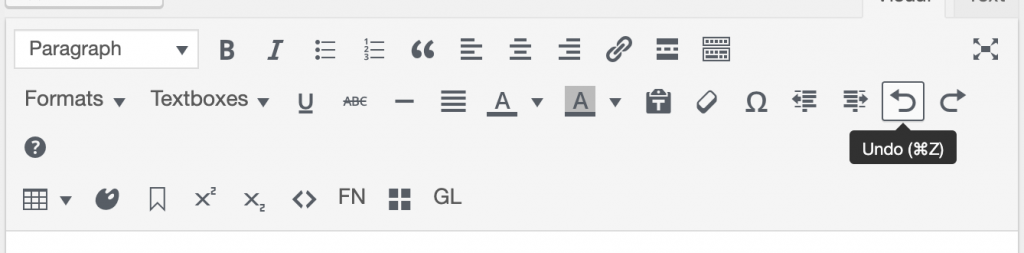
The RCE includes icons for different formatting options. Mouse over each icon to learn its function. You can manage headings and heading sizes from the dropdown menu in the upper right of the RCE.
Adding and Editing Your Content
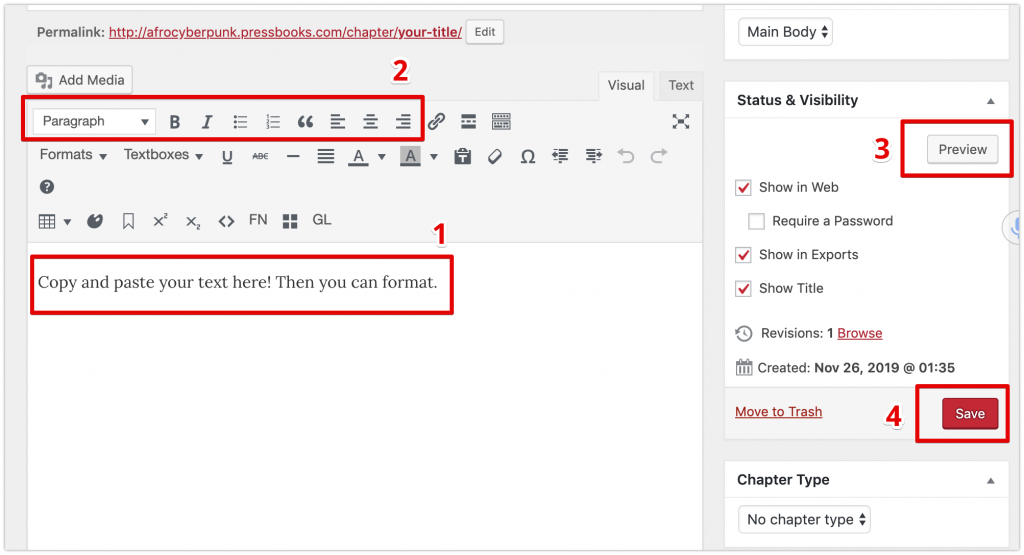
From the editing window you can:
- Compose content or copy and paste text from another word document
- Format your text using the RCE (i.e. headings, font, lists, alignment, etc.)
- Preview allows you to view your page as it will appear once published
- Save your work. Be sure to save before you log out
Metadata Fields
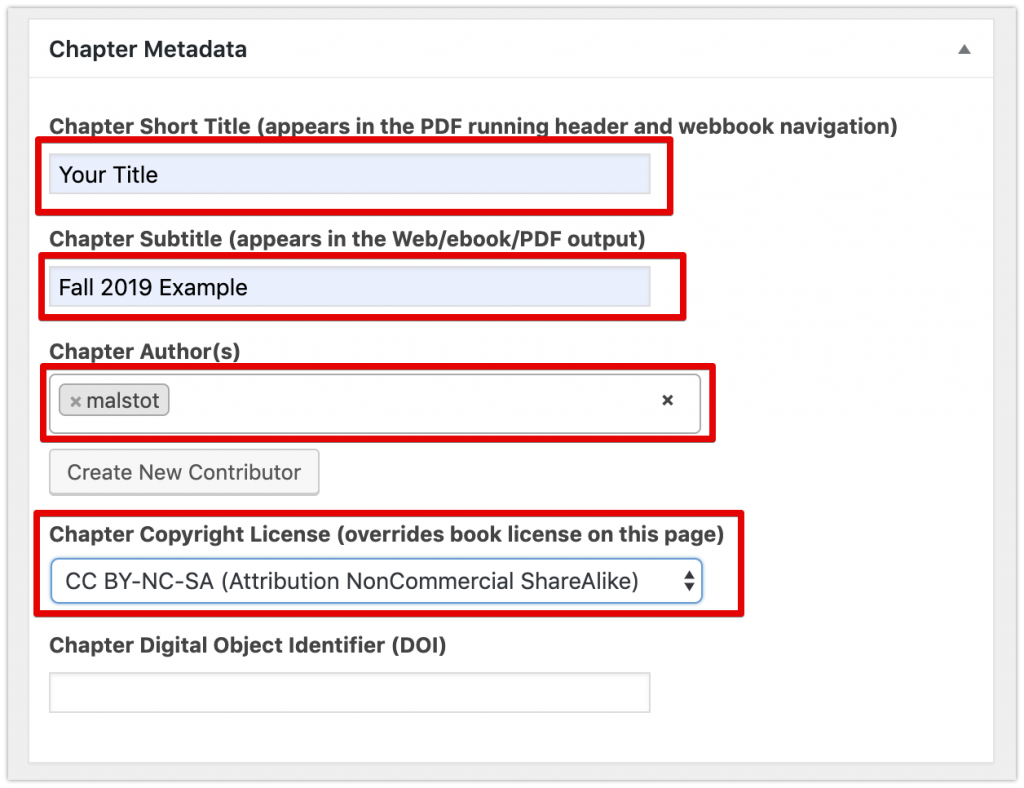
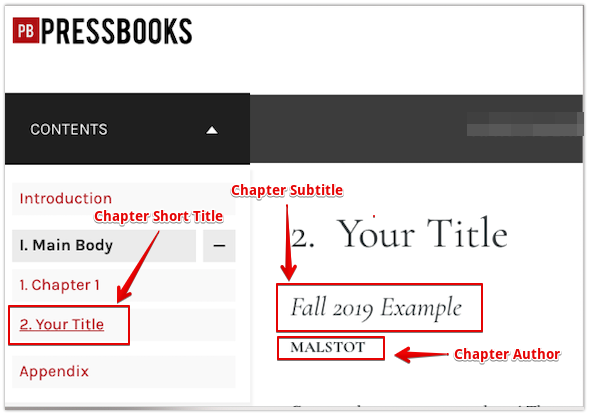
Metadata determines how your title, subtitle and name will appear in the published version of your chapter, and it controls licensing of your work. Metadata is located beneath the text editing field.
- Chapter Short Title – Text in this field determines how your title will appear in the Table of Contents
- Chapter Subtitle – Text in this field generates a subtitle for your work
- Chapter Author – How your name appears is determined by the username established by the book’s administrator. Select your name from the menu.
- Chapter Copyright License – From the dropdown menu, select the licensing permissions you wish to grant readers. Licenses include All Rights Research, Creative Commons, and Public Domain.
Select Preview from the Status and Visibility Menu to see how your metadata will appear once published. You can always return and edit your metadata.
Adding Accessible Images
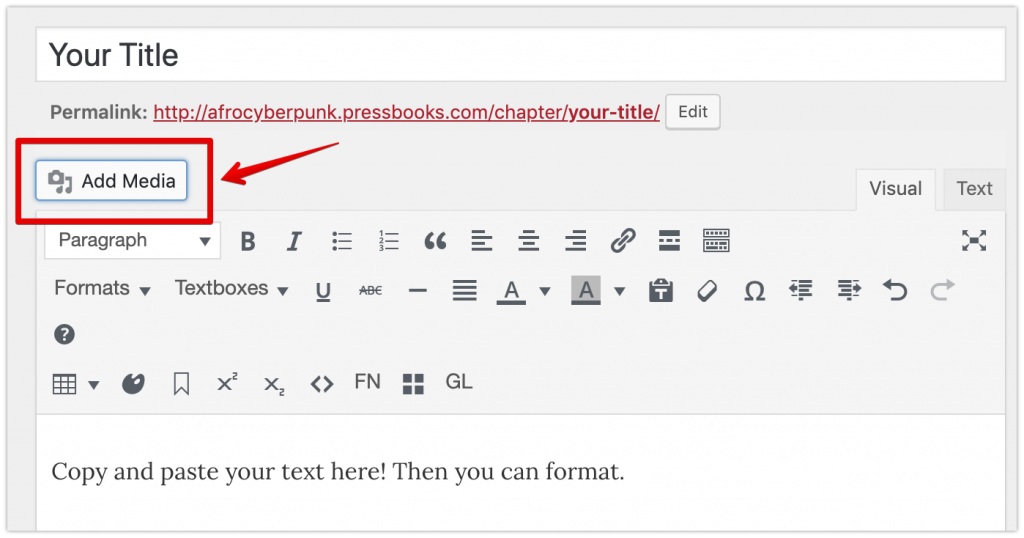
Click on the Add Media tab above the RCE.
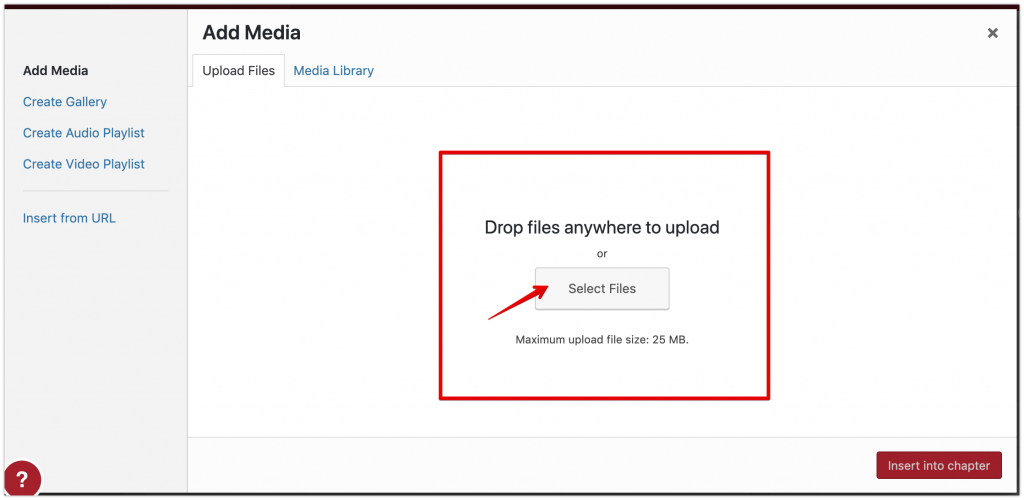
Drag and drop image files to add them to your media library or click on Select Files to locate image files saved to your machine or device.
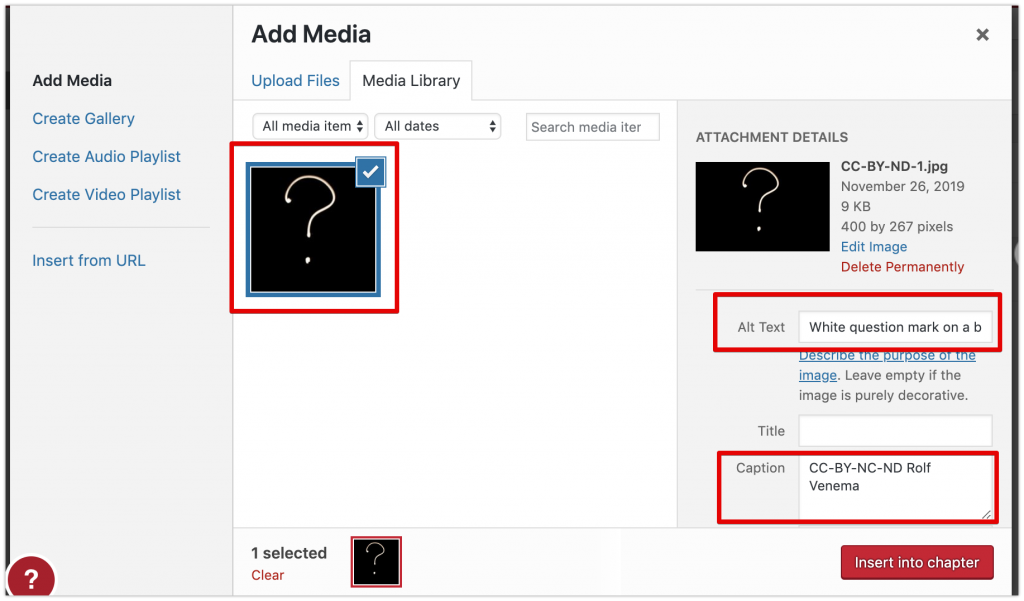
Selected images will appear in your media library. Click on the image to select it. Then, input additional information in the Attachment Details field, including:
- Alt Text – A written description of the image
- Attribution – In the Caption field cite the image source if applicable
If applicable, link the image to its source (i.e. Flickr, Unsplash, etc.). Scroll down to Attachment Display Settings. Select Custom URL from the dropdown menu next to Link To.
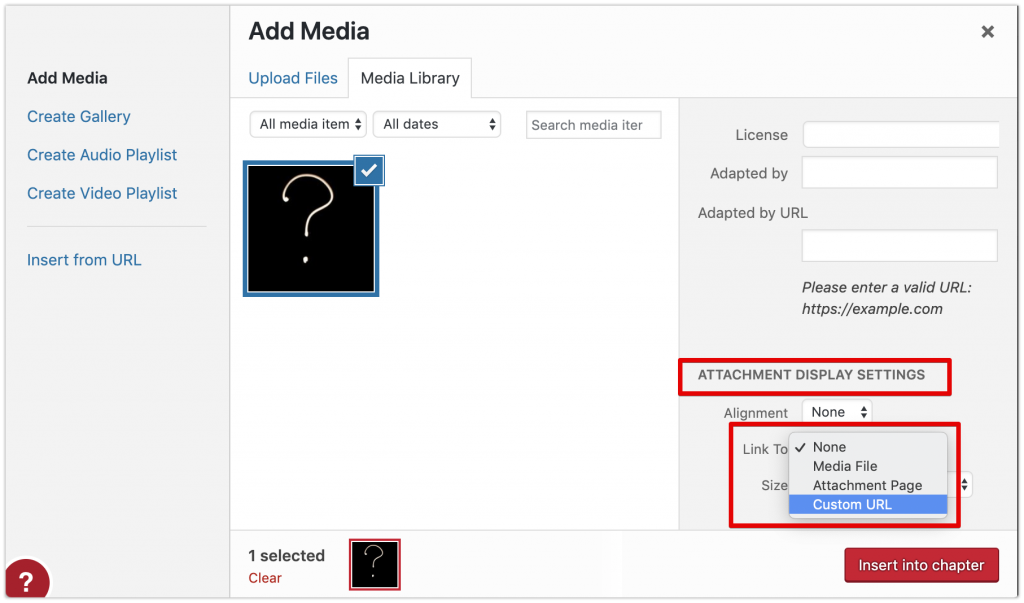
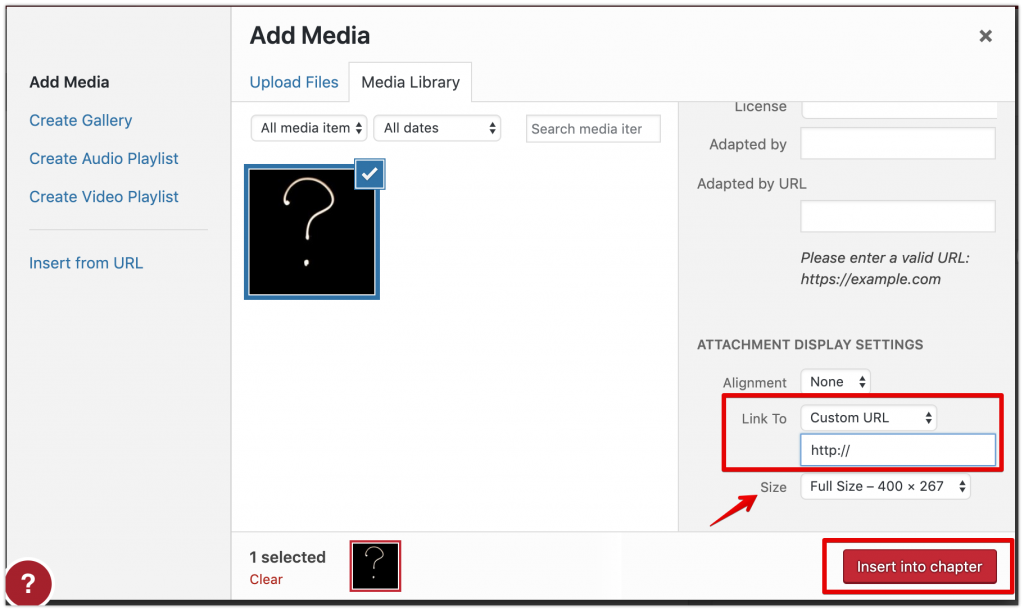
Paste the URL to the image source in the box. To finish, click Insert into Chapter. Once published, your image will appear with the attribution in the caption. Clicking on the image will take readers to the image source.
Saving and Editing
You can continue to edit your chapter as long as you have access from the Pressbook Administrator. Be sure to click save before leaving the editor. To continue working, go to https://pressbooks.com/ and login with your username and password.
How to get Help!
For additional support, consult:
